How to Make a 90-Degree Corner Turn With LED Light Strips?
LED lights are amazing. They come in all shapes and sizes, they’re efficient and durable, and they can be used for a variety of purposes. But one thing that’s tricky about LED lights is making a corner turn.
In this blog post, we’re going to take a look at three different methods for making a corner turn with LED light strips, as well as the pros and cons of each method. We’ll also discuss some tips for ensuring that your corner turn goes as smoothly as possible.
Can you bend LED strip lights around corners?
Yes, you can bend LED strip lights around corners. However, it’s important to note that not all LED strip lights are created equal. Some are designed to be flexible and can be easily bent into shape, while others are not.
If you’re not sure whether or not your LED strip lights are flexible, it’s always best to err on the side of caution and consult the manufacturer’s instructions before attempting to bend them.
Now that we’ve got that out of the way, let’s take a look at how to make a corner turn with LED light strips.
Also read: How long do LED light strips last
What do you need to make a corner turn with LED light strips?
Before we get started, it’s important to gather all of the supplies you’ll need for this project.
- LED light strip
- Flexible LED light strip (optional)
- Tape measure
- Sharp scissors or a utility knife
- Miter box (optional)
- L-connector (optional)
Pro Note: LED lights are a great way to add some ambiance and lighting moods to your home. The most common width for an LED strip light will be 3/8″ or 10mm, but it’s important that you get the right connector size so they fit into place easily!
Three methods for making a corner turn with LED light strips
Method 1: Make a Mitered Cut
One way to make a corner turn with LED light strips is to make a mitered cut. This method is best suited for flexible LED light strips. If you’re using rigid LED light strips, you can still use this method, but you may need to use an L-connector (more on that later).
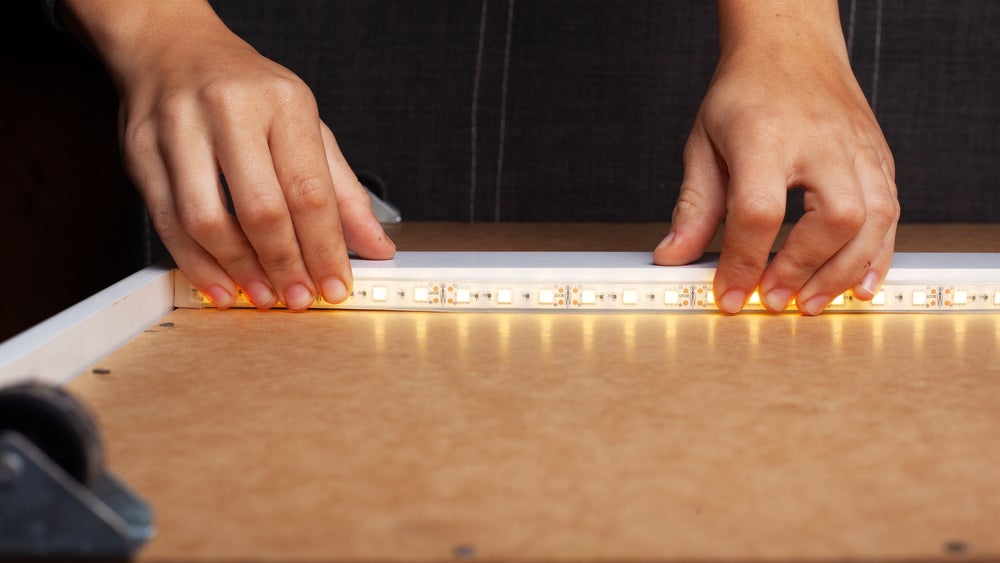
To make a mitered cut, start by measuring the length of the LED light strip you need. Then, use a miter box or a sharp pair of scissors to make a 45-degree cut at each end of the LED light strip.
Next, take one of the cut pieces and bend it so that it forms a 90-degree angle. Make sure that the two cuts are flush against each other. If they’re not, you can use a small piece of clear tape to secure them in place.
Finally, turn on your LED light strip to test it out. If everything looks good, congratulations! You’ve just made a corner turn with an LED light strip.
Method 2: Make a Butt Joint
If you’re using rigid LED light strips, you may need to make a butt joint in order to make a corner turn. This method is similar to the mitered cut method, but instead of making a 45-degree cut, you’ll make a 90-degree cut.
Start by measuring the length of LED light strip you need. Then, use a miter box or a sharp pair of scissors to make a 90-degree cut at each end of the LED light strip.
Next, take one of the cut pieces and bend it so that it forms a 90-degree angle. Make sure that the two cuts are flush against each other. If they’re not, you can use a small piece of clear tape to secure them in place.
Finally, turn on your LED light strip to test it out. If everything looks good, congratulations! You’ve just made a corner turn with an LED light strip.
Method 3: Use an L-Connector
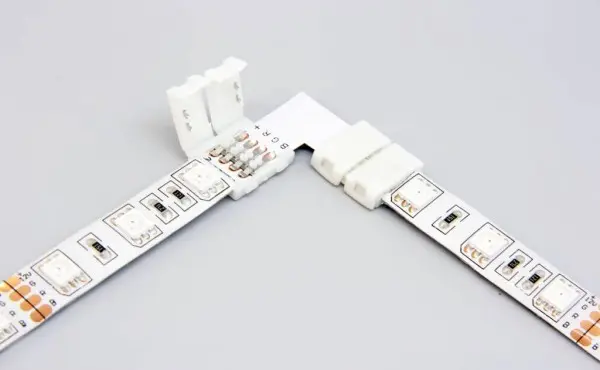
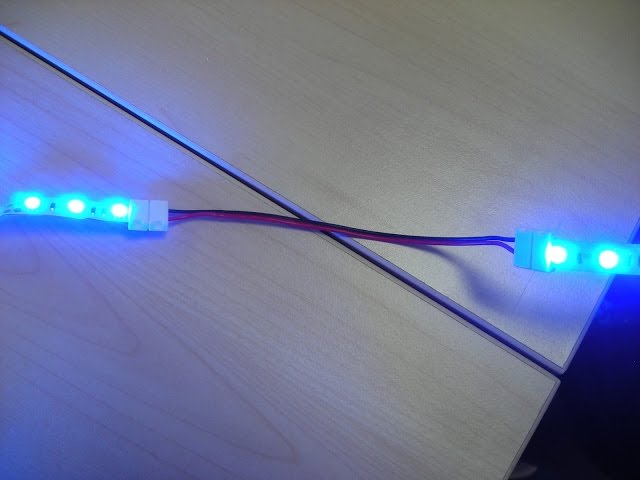
If you’re using rigid LED light strips and you don’t want to make a mitered or butt joint, you can use an L-connector to make a corner turn by connecting the LED light strips.
To do this, start by measuring the length of LED light strip you need. Then, use a sharp pair of scissors or a utility knife to make a straight cut at each end of the LED light strip.
Next, take one of the cut pieces and insert it into the L-connector. Make sure that the two cuts are flush against each other. If they’re not, you can use a small piece of clear tape to secure them in place.
Finally, turn on your LED light strip to test it out. If everything looks good, congratulations! You’ve just made a corner turn with an LED light strip.
Also read: How to change LED light color without remote
Pros and Cons of each method
Now that we’ve looked at three different methods for making a corner turn with LED light strips, let’s compare their pros and cons.
Method 1: Make a mitered cut
Pros:
- This method is best suited for flexible LED light strips.
- It’s a simple method.
Cons:
- If you’re using rigid LED light strips, you may need to use an L-connector.
Method 2: Make a butt joint
Pros:
- This method is best suited for rigid LED light strips.
- It’s a relatively simple method.
Cons:
- You may need to use an L-connector if the two cuts are not flush against each other.
Method 3: Use an L-connector
Pros:
- This method can be used for both flexible and rigid LED light strips.
- It’s a simple method too.
Cons:
- You may need to use an L-connector if the two cuts are not flush against each other.
Conclusion
In conclusion, making a 90-degree corner turn with LED light strips requires precision and attention to detail to achieve a seamless and aesthetically pleasing outcome. The process can be approached in several ways, depending on the specific requirements of the installation and the flexibility of the LED strip being used. One common method involves cutting the LED strip at the designated cut marks and using connectors specifically designed for 90-degree turns. These connectors, which come in rigid or flexible formats, allow for a clean and straightforward connection without the need for soldering, making them ideal for DIY enthusiasts or those looking to quickly adapt their lighting setup to complex room layouts.
Moreover, for a more integrated look, some prefer to make custom bends directly in the LED strip, although this requires a strip that is flexible enough to handle such manipulation without damaging the circuitry. This method involves carefully planning the positioning and bending of the strip at the corner junction, ensuring that the LEDs maintain consistent lighting without creating stress points that could lead to breakage or uneven lighting. Whichever method is chosen, it is crucial to ensure that all connections are secure and that the LED strip is adequately supported along the corner turn to prevent sagging or detachment over time. Additionally, considering the use of aluminum profiles or channels can provide added support and enhance the overall appearance of the installation, integrating the lighting smoothly into the room’s design. By mastering these techniques, one can effectively utilize LED strips to illuminate complex spaces, enhancing both the functionality and ambiance of any environment.