How to Make a 90-Degree Corner Turn With LED Light Strips?
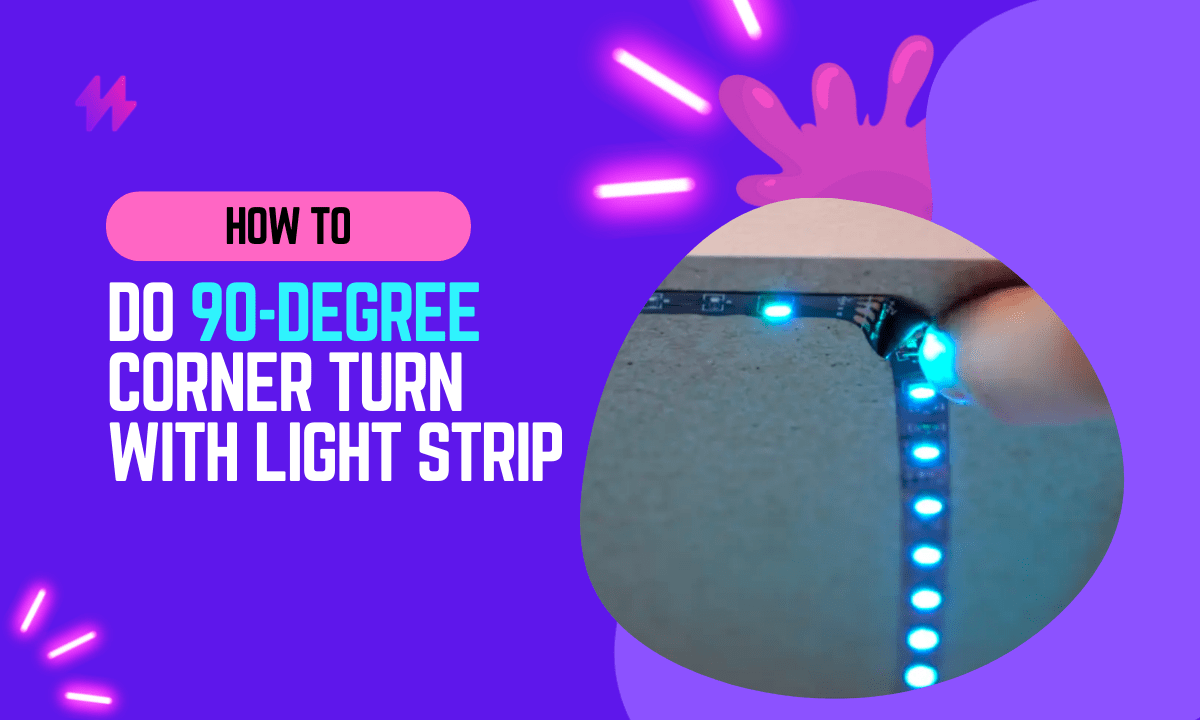
LED lights are amazing. They come in all shapes and sizes, they’re efficient and durable, and they can be used for a variety of purposes. But one thing that’s tricky about LED lights is making a corner turn.
In this blog post, we’re going to take a look at three different methods for making a corner turn with LED light strips, as well as the pros and cons of each method. We’ll also discuss some tips for ensuring that your corner turn goes as smoothly as possible.
LED light strips can be a versatile lighting solution, especially when you need to navigate corners in your lighting system. Understanding how to make a 90 degree corner turn with LED light strips can enhance your task-lighting application, providing bright illumination even around edges and obstacles.
How to Make a 90 Degree Corner Turn with LED Light Strips: Bending LED Strip Lights Around Corners
Yes, you can bend LED strip lights around corners. However, it’s important to note that not all LED strip lights are created equal. Some are designed to be flexible and can be easily bent into shape, while others are not.
If you’re not sure whether or not your LED strip lights are flexible, it’s always best to err on the side of caution and consult the manufacturer’s instructions before attempting to bend them.
Now that we’ve got that out of the way, let’s take a look at how to make a corner turn with LED light strips.
Also read: How long do LED light strips last
Bending LED strip lights can create smooth and beautiful transitions at various angles, ensuring your LED lighting remains seamless throughout your space. With a clean corner fold technique, you can achieve a simplified corner turn that maintains the aesthetic of your LED system while effectively illuminating rounded edges.
What You Need for Corner Turns with LED Light Strips: Essential Methods and Tools
Before we get started, it’s important to gather all of the supplies you’ll need for this project.
- LED light strip
- Flexible LED light strip (optional)
- Tape measure
- Sharp scissors or a utility knife
- Miter box (optional)
- L-connector (optional)
Pro Note: LED lights are a great way to add some ambiance and lighting moods to your home. The most common width for an LED strip light will be 3/8″ or 10mm, but it’s important that you get the right connector size so they fit into place easily!
When working with LED products, ensure you have the correct connectors and materials to facilitate a gradual turn in your lighting arrangement. Properly executing these corner transitions will enhance the overall design and functionality of your space.
Three Effective Techniques for Corner Turns with LED Strip Lights
Method 1: Creating a Mitered Cut for LED Strip Lights
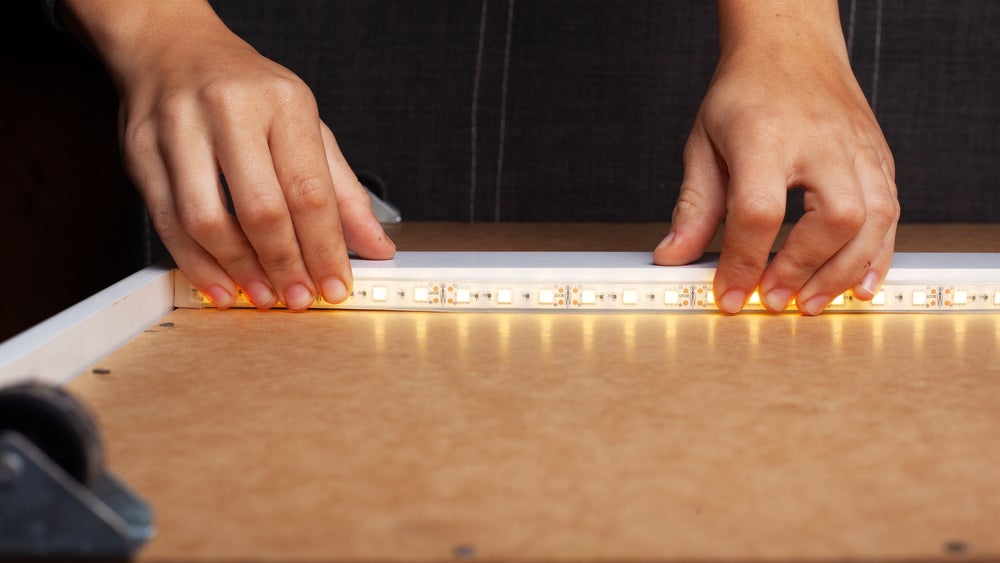
One way to make a corner turn with LED light strips is to make a mitered cut. This method is best suited for flexible LED light strips. If you’re using rigid LED light strips, you can still use this method, but you may need to use an L-connector (more on that later).
To make a mitered cut, start by measuring the length of the LED light strip you need. Then, use a miter box or a sharp pair of scissors to make a 45-degree cut at each end of the LED light strip.
Next, take one of the cut pieces and bend it so that it forms a 90-degree angle. Make sure that the two cuts are flush against each other. If they’re not, you can use a small piece of clear tape to secure them in place.
Finally, turn on your LED light strip to test it out. If everything looks good, congratulations! You’ve just made a corner turn with an LED light strip.
Creating 90-degree corner turns with rigid LED light strips can significantly improve the overall look of your lighting arrangement. Mastering different cutting techniques, such as making precise cuts, is essential to achieve seamless transitions in your setup.
When creating a visually appealing LED lighting setup, detailed techniques like a mitered cut are essential. Proper execution of these methods ensures that your LED light strips not only illuminate well but also seamlessly integrate around corners.
Method 2: Utilize a Butt Joint Technique for LED Strip Light Corners
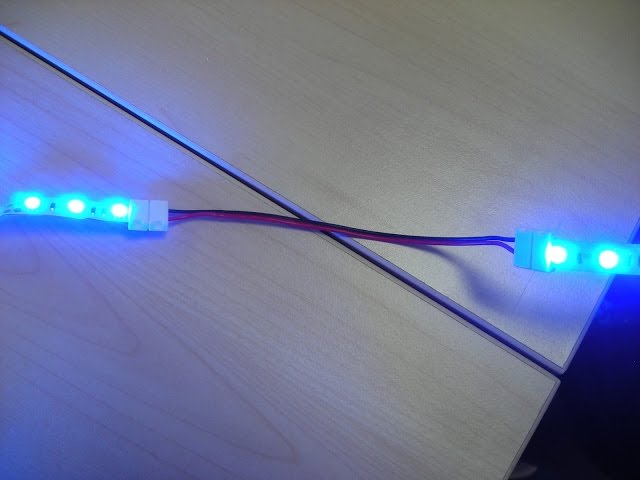
If you’re using rigid LED light strips, you may need to make a butt joint in order to make a corner turn. This method is similar to the mitered cut method, but instead of making a 45-degree cut, you’ll make a 90-degree cut.
Start by measuring the length of LED light strip you need. Then, use a miter box or a sharp pair of scissors to make a 90-degree cut at each end of the LED light strip.
Next, take one of the cut pieces and bend it so that it forms a 90-degree angle. Make sure that the two cuts are flush against each other. If they’re not, you can use a small piece of clear tape to secure them in place.
Finally, turn on your LED light strip to test it out. If everything looks good, congratulations! You’ve just made a corner turn with an LED light strip.
Method 3: Using an L-Connector for LED Light Strips
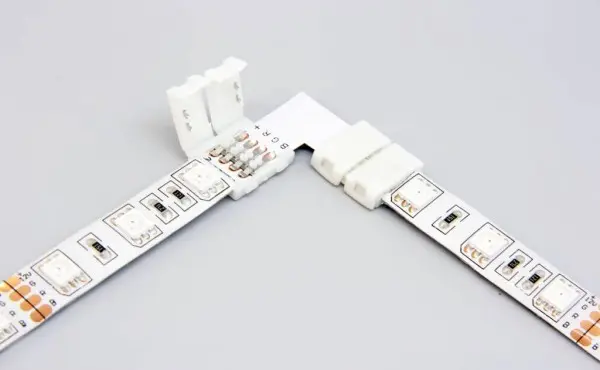
If you’re using rigid LED light strips and you don’t want to make a mitered or butt joint, you can use an L-connector to make a corner turn by connecting the LED light strips.
To do this, start by measuring the length of LED light strip you need. Then, use a sharp pair of scissors or a utility knife to make a straight cut at each end of the LED light strip.
Next, take one of the cut pieces and insert it into the L-connector. Make sure that the two cuts are flush against each other. If they’re not, you can use a small piece of clear tape to secure them in place.
Finally, turn on your LED light strip to test it out. If everything looks good, congratulations! You’ve just made a corner turn with an LED light strip.
Also read: How to change LED light color without remote
Achieving a clean and effective corner turn with your LED light strips can elevate the functionality of your lighting design. Utilizing an L-connector not only simplifies the installation process but also ensures a seamless flow of light around corners, enhancing both aesthetics and practicality.
Evaluating the Pros and Cons of Each LED Strip Light Corner-Bending Method
Now that we’ve looked at three different methods for making a corner turn with LED light strips, let’s compare their pros and cons.
Method 1: Make a mitered cut
Pros:
- This method is best suited for flexible LED light strips.
- It’s a simple method.
Cons:
Each method offers unique advantages and disadvantages depending on your specific lighting needs. By understanding the pros and cons, you can make an informed decision on how to achieve the best lighting results with your LED light strips.
- If you’re using rigid LED light strips, you may need to use an L-connector.
Method 2: Make a butt joint
Pros:
- This method is best suited for rigid LED light strips.
- It’s a relatively simple method.
Cons:
- You may need to use an L-connector if the two cuts are not flush against each other.
Method 3: Use an L-connector
Pros:
- This method can be used for both flexible and rigid LED light strips.
- It’s a simple method too.
Cons:
- You may need to use an L-connector if the two cuts are not flush against each other.
Conclusion: Evaluating Methods for Bending LED Strip Lights Around Corners
In conclusion, making a 90-degree corner turn with LED light strips requires precision and attention to detail to achieve a seamless and aesthetically pleasing outcome. The process can be approached in several ways, depending on the specific requirements of the installation and the flexibility of the LED strip being used. One common method involves cutting the LED strip at the designated cut marks and using connectors specifically designed for 90-degree turns. These connectors, which come in rigid or flexible formats, allow for a clean and straightforward connection without the need for soldering, making them ideal for DIY enthusiasts or those looking to quickly adapt their lighting setup to complex room layouts.
Moreover, for a more integrated look, some prefer to make custom bends directly in the LED strip, although this requires a strip that is flexible enough to handle such manipulation without damaging the circuitry. This method involves carefully planning the positioning and bending of the strip at the corner junction, ensuring that the LEDs maintain consistent lighting without creating stress points that could lead to breakage or uneven lighting. Whichever method is chosen, it is crucial to ensure that all connections are secure and that the LED strip is adequately supported along the corner turn to prevent sagging or detachment over time. Additionally, considering the use of aluminum profiles or channels can provide added support and enhance the overall appearance of the installation, integrating the lighting smoothly into the room’s design. By mastering these techniques, one can effectively utilize LED strips to illuminate complex spaces, enhancing both the functionality and ambiance of any environment.
How To Make A 90 Degree Corner Turn With LED Light Strips | Steps to Prepare for a 90 Degree Corner Turn
Preparing to make a 90 degree corner turn with LED light strips involves careful measuring and planning to ensure a seamless installation. Understanding how to make a 90 degree corner turn with LED light strips requires taking accurate measurements of your space to determine where the strips will be placed. Marking these spots beforehand helps visualize the layout and prevents common mistakes during installation. Accurate planning is essential in choosing the right cutting technique, whether opting for a mitered cut or a butt joint technique. Gathering necessary tools and supplies ahead of time will facilitate a smoother installation process, ensuring you achieve the desired effect for your lighting project.
How to Make a 90 Degree Corner Turn With LED Light Strips | Measuring and Planning for LED Strip Placement
Measuring and planning for LED strip placement is crucial for achieving a seamless 90-degree corner turn. Start by determining the exact length of the LED strips you need for each side of the corner. This involves measuring the wall space accurately. Having precise measurements will not only ensure proper fit but also prevent wastage of materials. Understanding how to make a 90 degree corner turn with LED light strips can transform your lighting project into a professional-looking installation.
Next, sketch a simple layout that highlights where the strips will be placed. Mark specific points for cutting, and consider the direction of the light to avoid dim areas. Knowing how to make a 90 degree corner turn with LED light strips includes planning for any obstacles such as furniture or electrical outlets. Taking the time to visualize and map out the installation will lead to a smoother process and a final look that enhances your space.
Gathering Necessary Tools and Supplies
Before starting the project, it’s essential to collect all necessary tools and supplies. Having everything on hand streamlines the process of learning How to Make a 90 Degree Corner Turn With LED Light Strips. Key items include a measuring tape, a sharp utility knife, and mounting hardware suited for your specific LED strips. Don’t forget about connectors, as they are critical for seamless transitions at the corners.
Choosing the right adhesive or mounting method is also crucial for a successful installation. This ensures your LED strips remain securely in place while executing the techniques for How to Make a 90 Degree Corner Turn With LED Light Strips. Be sure to have a clean cloth for surface preparation and possibly a heat gun for flexible strips. Gathering these tools ahead of time will help you achieve the best results.
Detailed Instructions for Each Corner Turning Technique
To achieve a seamless installation, it’s essential to explore different techniques for making a 90-degree corner turn with LED light strips. Understanding how to make a 90-degree corner turn with LED light strips involves selecting the right method for your project. Two popular approaches are the mitered cut method and the butt joint technique, each offering distinct advantages regarding aesthetics and ease of installation. Proper execution of these methods ensures that the LED strips follow the corner smoothly without compromising the light quality. Carefully following the step-by-step guides for each technique will enhance your project’s overall appearance and functionality.
StepbyStep Guide for Mitered Cut Method
The mitered cut method is an effective way to achieve a clean 90-degree corner turn with LED light strips. To begin, you’ll need to measure the desired length of your LED strips accurately. Make sure to mark the cutting points at a 45-degree angle to create two complementary pieces that will fit together seamlessly at the corner. Understanding how to make a 90-degree corner turn with LED light strips using this method can ensure a polished and professional look in your installation.
After marking your cut lines, use a precise cutting tool such as a box cutter or a specialized LED strip cutter. Ensure that your cuts are clean and straight, as any imperfections can disrupt the light consistency at the corner. Once the strips are cut, test the fit before securing them in place. Knowing how to make a 90-degree corner turn with LED light strips effectively will enhance the overall aesthetic and functionality of your lighting project.
StepbyStep Guide for Butt Joint Technique
The butt joint technique is a straightforward method for achieving a clean 90-degree corner turn with LED light strips. First, accurately measure the lengths needed for each strip, ensuring they fit perfectly into the corner. Align the ends of the two LED strips against the corner without overlapping. This method minimizes the appearance of seams and provides a seamless transition of light from one strip to another, enhancing the overall aesthetic.
To secure the LED strips using the butt joint technique, use double-sided adhesive tape or appropriate mounting brackets. Carefully press the strips into place, ensuring they maintain a straight line at the corner. To ensure optimal performance, it’s essential to check that both strips connect to the same power source, allowing for consistent illumination. This method simplifies the process of how to make a 90 degree corner turn with LED light strips and provides reliable results.
Tips for Successful Installation of LED Light Strips
Successful installation of LED light strips requires attention to detail, especially when executing techniques like how to make a 90 degree corner turn with LED light strips. Ensuring clean and precise cuts is crucial for achieving a professional finish. Using a sharp blade can help create smooth edges, preventing fraying or damage to the strips. Securing LED strip lights effectively is another key factor; using appropriate adhesives or mounting clips ensures that the strips stay in place over time. By following these guidelines, you can achieve seamless corner turns and enhance the overall aesthetic of your lighting project.
Ensuring Clean and Accurate Cuts
Clean and accurate cuts are crucial for achieving a professional finish when learning how to make a 90 degree corner turn with LED light strips. Use a sharp utility knife or scissors specifically designed for cutting flexible LED strips. Make sure to measure carefully and mark the cutting lines clearly, as this will help prevent mistakes that could compromise the overall look and functionality of your installation.
Pay attention to the designated cut points on the LED strip. These locations are marked by small lines indicating where cuts can be made without damaging the circuit. Following these guidelines will ensure you create clean edges, which is essential for both the butt joint and mitered cut methods. Mastering how to make a 90 degree corner turn with LED light strips begins with these precise cutting techniques.
Securing LED Strip Lights Effectively
Properly securing LED light strips is crucial for achieving a clean and polished look, especially when learning how to make a 90 degree corner turn with LED light strips. Using double-sided tape is a popular method, as it provides a strong bond and easy installation. Ensure that the mounting surface is clean and dry before applying the tape. This will enhance adhesion and prevent the strips from peeling away over time.
For added support, consider using corner brackets or clips specifically designed for LED strip lights. These accessories help maintain the shape and alignment of the strips at the corners, which is essential while figuring out how to make a 90 degree corner turn with LED light strips. Securing the strips in place not only improves the aesthetic but also prolongs the lifespan of the lighting by preventing strain on the connections.
Conclusion
Successfully executing a 90 degree corner turn with LED light strips enhances both the aesthetics and functionality of any lighting project. Understanding how to make a 90 degree corner turn with LED light strips requires careful measuring and planning. Choosing the right methods, whether it’s the mitered cut technique or the butt joint technique, ensures seamless integration around corners. Using the correct tools and materials is essential for achieving a professional finish, and the tips for ensuring clean cuts and secure placements contribute to a polished final look. Embracing these techniques and suggestions allows for creative and effective use of LED light strips in any space.

