How to Fix a Broken LED Light Strip in 2023?
LED light strips have become one of the most popular types of home lighting in recent years. They’re affordable, efficient, and can be installed almost anywhere. But what happens when your LED strip stops working?
In this article, we will explore what causes a broken led light strip and how to fix it. We’ll also tell you about some of the risks associated with repairing your own led strip.
5 Reasons that Cause Broken LED Strip
1. Damaged LED Chips
The most common cause of a broken LED strip is damaged LED chips. These chips can be damaged by physical impact, static electricity, or manufacturing defects. If you see any cracks or breaks in the LEDs, chances are that’s the problem.
2. Poor Soldering Joints
If the solder joints between the LEDs and the PCB are poor, they can cause the strip to fail. This is usually caused by moisture or heat damage. You may be able to spot this problem if you see discoloration around the joints.
3. Improper Power Supply
Another common cause of a broken LED strip is an improper power supply. The wrong power supply can damage the LEDs or the PCB. Make sure you’re using the correct power supply for your LED strip.
4. Wrong Polarity
If you connect the power to your LED strip backward, it will damage the LEDs. This is because the LEDs are only designed to work with one polarity of the voltage. Make sure you double-check the polarity before connecting the power.
5. Excessive Voltage
Applying too much voltage to an LED will damage it. This is why it’s important to use a regulated power supply that can’t output more than the maximum voltage rating of your LED strip.
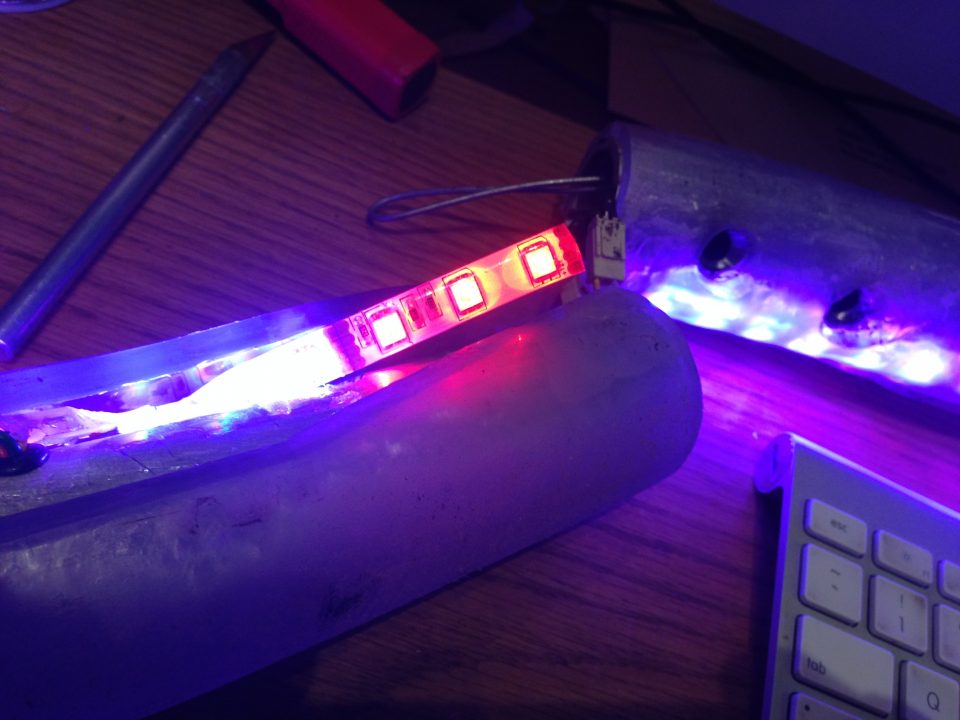
How to Fix a Broken Led Strip?
- Determine the area of damage
- Unplug the light strip
- Detach adhered lights with the blade if possible
- Use scissors along the copper markings to cut out the damaged section
- Cut a new section of the same light strip from a new or leftover roll
- Attach back-to-back pin connectors to each section of the light strip
- Be sure to use the proper number of connector pins (2-pin, 4-pin, or 5-pin)
- Test your lights and re-apply them to the surface.
The best way to fix a broken led strip is to replace the damaged chips or solder joints. This can be done with a soldering iron and some basic electronic knowledge. If you’re not comfortable soldering, there are led strip repair kits available that will do the job for you.
Be aware that repairing your own LED strip can be dangerous. If you don’t know what you’re doing, you could end up causing more damage to the strip or even hurting yourself. We recommend that you consult with an experienced electrician before attempting any repairs.
Risks of Fixing a Broken Led Strip
There are some risks associated with fixing a broken led light strip. These include:
- Damage to the LED chips: If you try to replace the LED chips without proper training, you could end up causing more damage.
- Poor soldering joints: If you don’t know how to properly solder, you could end up with poor joints that can cause the strip to fail.
- Improper power supply: If you use the wrong power supply, you could damage the LEDs or the PCB.
- Wrong polarity: If you connect the power to the LED strip backward, you could damage the LEDs.
We recommend that you consult with an experienced electrician before attempting any repairs. They will be able to properly assess the damage and make the necessary repairs.
Also read: 10 Reasons and How to stop LED light flickering
Conclusion
In conclusion, repairing a broken LED light strip in 2023 involves a series of precise yet achievable steps that can restore the functionality of your lighting without the need for costly replacements. The process starts with accurately diagnosing the problem, whether it’s a faulty segment, a disconnected wire, or a malfunctioning controller. Identifying the issue correctly is crucial, as it determines the subsequent steps, whether re-soldering connections, replacing a segment, or simply resecuring loose wires. Tools like a multimeter can be instrumental in this process, helping to locate breaks or shorts within the strip. Once the problem area is identified, ensuring that the power is safely disconnected before attempting any repairs is essential for safety.
Furthermore, the evolution of LED strip technology has led to the availability of repair kits and detailed tutorials that guide users through the repair process. Manufacturers often provide specific guidance for their products, which can include replacement parts that are designed to fit seamlessly with the original installation. For more complex issues, such as circuit failures or extensive damage, consulting with a professional may be the best course of action to ensure that the repairs are durable and do not compromise the overall safety of the lighting system. Taking the time to learn about the specific needs and vulnerabilities of LED light strips can not only extend the life of the lighting but also enhance the overall experience by ensuring that these innovative lighting solutions continue to function at their best, providing efficient, customizable lighting for a variety of settings.